DAS 4WD-ZELT - ROBS T3 SYNCRO
Es muss ungefähr 1991 gewesen sein, als ich zum ersten Mal in einem VW T3 saß. Nach dem Tod meiner Mutter wuchs ich in einem Waisenhaus auf, und dort hatten wir zwei dieser weißen VWT3-Transporter, mit denen wir herumfuhren.
Damals wurde das Waisenhaus von christlichen Nonnen geleitet, und die fuhren diese Dinger - nicht wirklich gut, also war es immer ein Abenteuer.
Ich erinnere mich an wirklich lustige Geschichten, als wir in den Sommerferien für unsere jährlichen zweiwöchigen Strandurlaube nach Italien fuhren. Das war der Höhepunkt des Jahres. Wir zelteten, aßen im Freien und lebten unter den Pinienbäumen am Strand. Wir hatten nie irgendwelche Probleme mit den Vans - sie brachten uns sicher, sonnenverbrannt und glücklich zurück.

Die Jahre vergingen und als ich 19 war, führte mich mein Sommerurlaub an die französische Atlantikküste, um das Surfen zu lernen. Wieder zeltete ich unter Pinienbäumen mit vielen anderen Surfern und ihren maßgeschneiderten Abenteuer-Mobilen. Der Campingplatz war voll und es war kein Platz mehr frei. Da entdeckte ich diese Perfektion eines VW-Busses - ein viel höherer T3 mit größeren Reifen und den 4×4 Syncro-Aufklebern darauf. Und er parkte oben auf einer kleinen Sanddüne, wo kein anderes Auto ohne Allradantrieb hinaufkam.

Im Jahr 2007 habe ich die Investition getätigt und einen T3 Syncro gekauft - den Van oder zumindest eine gute Basis, um den Van meiner Träume zu bauen. Es war ein alter, leerer Militärtransporter mit Plastiksitzen, aber mit wenig Rost und geringem Kilometerstand. Ich habe 5400 Euro bezahlt - was vor 8 Jahren viel für einen so alten Van war, aber nichts im Vergleich zu den Preisen, die heute für sehr einfache Syncro-Vans verlangt werden.
Es schien wie eine solide Basis zu beginnen entlang Umwandlung Prozess. Zuerst habe ich den Innenraum bis auf das Metall entkleidet und alles gereinigt. Ich brachte überall schalldämpfende Matten an und isolierte die gesamte Karosserie. Das Heck erhielt ein klappbares Bett und darunter Stauraum für die zweite Batterie, die Elektronik, den Sound und die Webasto-Dieselheizung. Ich habe neue Seitenwände und Dachpaneele aus Holz angefertigt und sie mit echtem Alcantara-Stoff bezogen. Bei Ebay fand ich ein paar gebrauchte Pilotensitze und ein gutes Alpine-Radio. Später investierte ich in ein paar größere Offroad-Räder.

Ich habe den Van 6 Jahre lang so gefahren. Aber der salzige Wintereinsatz und die schlechte Militär-Mattlackierung haben die Karosserie sehr schnell zerstört. Überall tauchte massiver Rost auf und je tiefer man schaut, was sich unter den "Blasen" befindet, desto frustrierter ist man, wenn sich der Schraubenzieher durch das poröse Metall bohrt. Der alte Motor machte auch immer mehr Probleme, so dass ich vor zwei Jahren, im Herbst 2013, vor der Entscheidung stand, ob ich ihn aufgeben oder wieder investieren sollte, um den Van wieder auf die Beine zu bringen.
ICH HATTE NICHT VOR, EINE GROSSE MENGE GELD ODER ZEIT ZU INVESTIEREN.
Auf der Suche nach einer guten Karosserielackiererei bin ich auf Marco Romaldini und seine Firma Romaldini & Biccario in München gestoßen. Er ist nur ein paar Jahre älter als ich, ein Mountainbike-Enthusiast und betreibt eine der besten Lackierereien in Deutschland.
Sein Parkplatz war voll mit Ferrari, Mc Laren und Aston Martin Supercars, als ich mit meinem alten rostigen Van ankam. Ich dachte mir - scheiß drauf, das ist der falsche Ort, dreh um und suche mir etwas weniger Exklusives. Aber zum Glück tat ich das nicht. Nach ein paar Minuten mit Marco wusste ich, dass er die richtige Person ist, der ich vertrauen kann. Das war im Herbst 2013 und der Beginn einer kompletten Restaurierung. Der Van brauchte einige neue Karosserieteile aus Metall, einige professionelle Schweißarbeiten und Rostentfernung.
ZU BEHONEST - ICH HATTE KEINE AHNUNG, WAS ICH ANGEFANGEN HATTE.
Wenn ich damals schon gewusst hätte, wie viel Arbeit das sein würde, hätte ich wahrscheinlich nie angefangen. Ich habe das halbe Auto zerlegt. Ich entfernte die Fenster, die Türen, das komplette Armaturenbrett und so weiter, um alle kleinen Ecken und Kanten gut sehen zu können. Marco gab mir die Möglichkeit, alle Vorarbeiten in einer Ecke seiner Werkstatt selbst zu erledigen. Ich dachte, dass ich in etwa zwei Wochen mit dem Wagen fertig sein würde. Es hat aber mehr als zwei Monate gedauert. Als ich vor dem Transporter stand - alles entkleidet, die Hängelampen, die aussahen wie herausgestochene Augäpfel - verlor ich den Glauben an das Projekt!
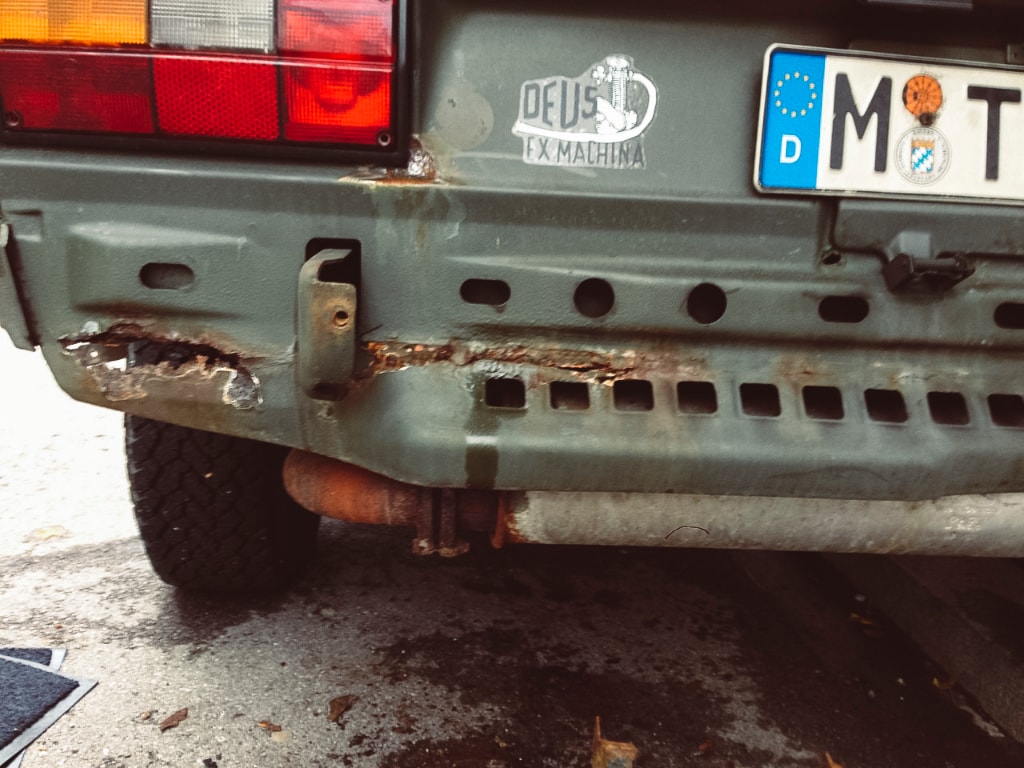
"WEGWERFEN. STOPPEN SIE HIER UND LASSEN SIE ES SEIN... ES IST EINE MASSIVE ZEIT- UND GELDVERSCHWENDUNG!"
Das habe ich mir oft gesagt. Es gab Tage, an denen ich zutiefst frustriert von der Werkstatt nach Hause kam, weil ich kein Ende sehen konnte. Aber Marco und sein Team haben mich irgendwie motiviert, auch wenn sie dachten, dass es völlig verrückt war, so viel Arbeit in so ein verrostetes, kaputtes Auto zu stecken. Ich machte weiter und tat, was getan werden musste. Es gab sowieso keinen Weg zurück...

Als ich anfing, die Karosserie abzuschleifen, dachte ich mir, dass ich dem Wagen bei dieser Gelegenheit auch eine komplett neue und andere Farbe geben könnte. Ich hatte die Nase voll von dem militärischen Nato-Olivgrün und dachte, dass der Van in einem moderneren grauen Anzug toll aussehen würde. Marco zeigte mir die über 200 grauen Optionen, aus denen ich wählen konnte... unglaublich. Ich hörte auf sein Fachwissen und wir entschieden uns für einen dunkelgrauen Metallic-Lack mit einer matten Klarlackschicht darüber.
Als der Van mit der frischen, vom Meister aufgetragenen Lackierung aus der Kabine rollte, waren alle Zweifel und Sorgen wie weggeblasen: Die Perfektion der neuen Lackierung - der neue, frische Look - ließ mich bei dem Gedanken, das Auto mit dem alten Motor zu betreiben und in der alten Innenausstattung zu leben, unwohl werden. Also musste ich einen Schritt weiter gehen und beschloss, alles zum zweiten Mal im Leben des Wagens neu zu machen.
Der Motor wurde durch einen modernen 120 PS Tdi mit vielen Sonderteilen ersetzt. Alles in Perfektion von Alexander Schank - einem echten Meister und Spezialisten für maßgeschneiderte Motoren und Getriebe. Er hat ein paar Monate gebraucht, um einen soliden Motor zu bauen, der den Charakter des Vans enorm verändert hat. Ein großer Vorteil ist nicht nur die zusätzliche Leistung, sondern auch die moderne und umweltfreundliche Technologie, die eingebaut wurde.
Das Auto entspricht allen modernen Standards - wirklich - nicht wie in der neuesten modifizierten VW-Schummler-Manier. Ich habe das Frühjahr 2015 damit verbracht, den kompletten Innenraum umzubauen und alle Türen, das Dach und die Seitenverkleidungen neu zu machen. Ich tauschte viele alte Kabel aus und installierte LED-Leuchten und neue Instrumente, um beim Fahren jederzeit die Kontrolle über meinen Motor zu haben. Ich habe in neue Recaro-Sitze investiert, denn es gibt nichts Wichtigeres als gute Sitze, wenn man Tausende von Kilometern auf und abseits der Straße unterwegs ist. Um beim Aufbau eines Camps fernab von Campingplätzen völlig autark zu sein, habe ich zwei neue Batterien, neue Ladegeräte und ein mobiles 100-Watt-Solarpanel installiert, um jederzeit genügend Strom zur Verfügung zu haben.

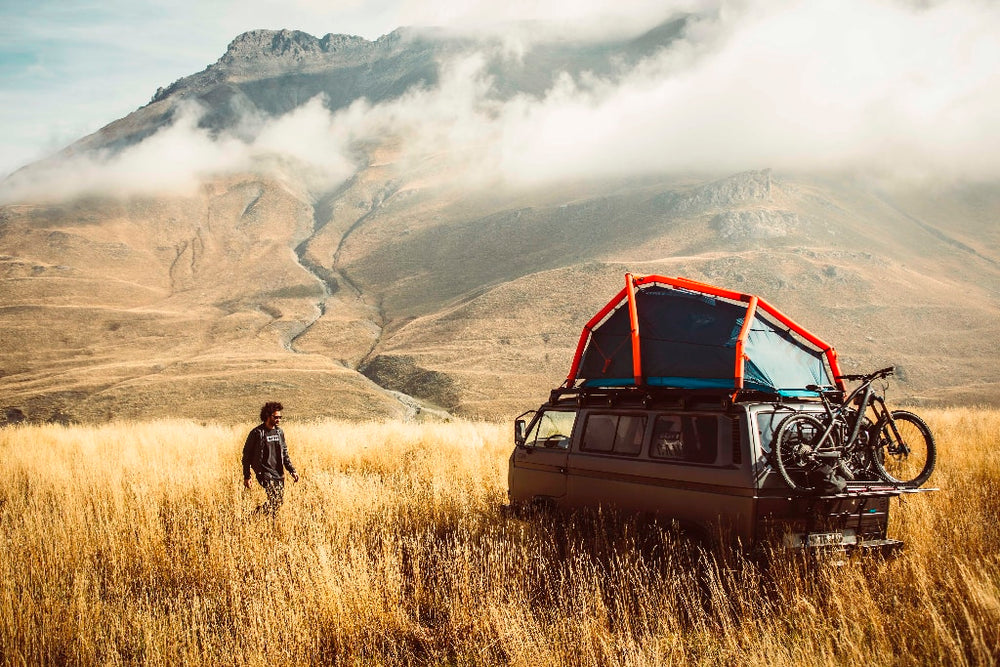
Da meine kleine Familie immer größer wurde, musste ich mir überlegen, wie wir alle in den Van passen. Wir sind jetzt 4, wenn wir als Familie reisen. Bisher hatten wir Platz auf dem großen Bett im Heck, aber mit einem weiteren Kind wird es viel zu eng. Ich habe viele Nächte damit verbracht, darüber nachzudenken, wie wir alle unterbringen können, wenn wir campen, ohne das Dach zu zerschneiden und ein classic Westfalia Aufstelldach zu installieren. Nun, es ist gar nicht schlecht, es zu haben, aber ich brauche für meinen Job einen robusten Dachträger, um ein Aufstelldach das ganze Jahr über mehr als nur zu nutzen. Ich habe eine Lösung gefunden und ein HEIMPLANET Zelt auf meinen Dachträger montiert. Es ist innerhalb von 5 Minuten aufgebaut, funktioniert hervorragend und löst mein Platzproblem auch noch auf ästhetisch coole Weise.
Die letzte große Restarbeit, die noch gemacht werden musste, war der komplette Unterboden. Sowohl mechanisch als auch um den Rost zu bekämpfen und das Metall gut genug für die nächsten ein oder zwei Jahrzehnte zu schützen. Wiederum mit der Hilfe von Romaldini hatte ich eine Werkstatt für mich zur Verfügung. Ich nahm alles auseinander - was einfacher klingt als es war. Ich brauchte eine Woche, um die 25 Jahre alten Bolzen zu öffnen. Die meisten bewegten sich überhaupt nicht, also musste ich sie aufschneiden und aufbohren. Ich ersetzte die alten Stoßdämpfer durch neue GMB-Mount höhenverstellbare.
Diese sind viel stärker und fester für eine gute Fahrt mit einem schwer beladenen Van auf und abseits der Straße. Ich habe auch alle Buchsen, Gelenke und Bolzen ersetzt. Alles neu. Ich habe auch die alten Trommelbremsen rausgeschmissen und neue Scheiben eingebaut, um die Bremsleistung zu verbessern. Zu guter Letzt erhielt der Unterboden eine 2-Wege-Bitumen-Metallic-Wachs-Beschichtung, um das Metall für viele weitere Jahre des harten Winter- und Offroad-Einsatzes zu schützen.
